
Heads up! Prisma no longer has a hobby tier so a lot of this rambling is out of date because we can't have nice things. I'm working on an updated tutorial using a different DB provider!
If you’re like me, you might – going into the holiday period of 2022 – be absolutely fucking sick of weird rich people being Extremely Online instead of just hiding in castles and shutting the fuck up like they’re supposed to.
This is happening to a nauseating fucking degree with Elon Musk and his extremely public ‘I see yer da’s taking the divorce well’ meltdown after buying Twitter for $44bn.
What this shows us – aside from the fact that you literally cannot overestimate the fragility of arl fuckin rubber face – is that no platform is safe from the tendrils of hypercapitalism; and that greed, stagnation, and incompetence will push people away.
So our data lives on servers that are owned by a fucking clown. The service we used to create that data is dying. What do we do? Build a shitty microblog that noone reads, obviously.
The fuck is a microblog?
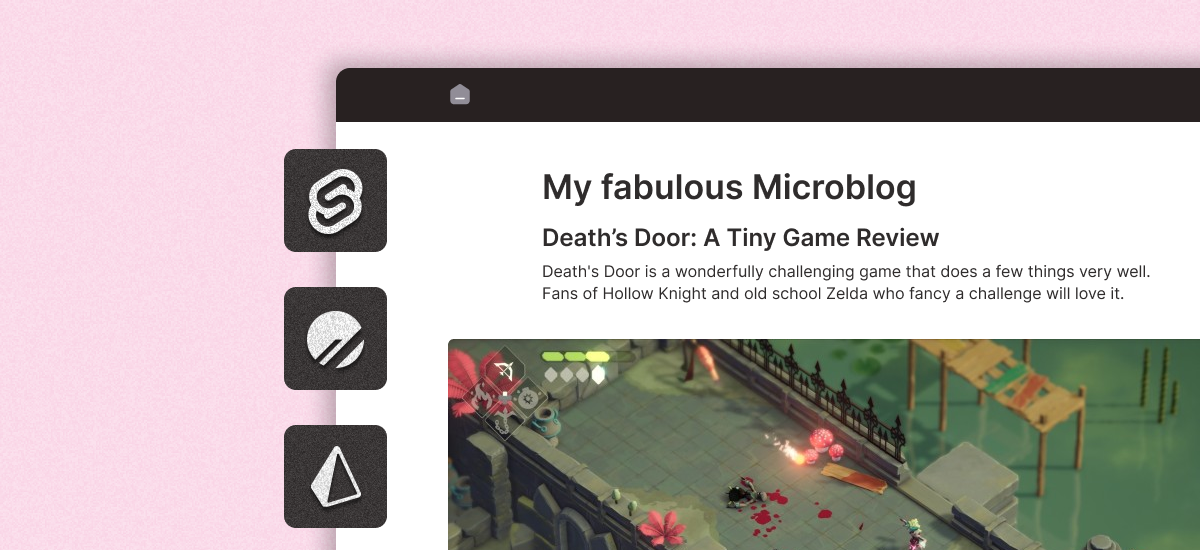
Basically just tweets that live on your own site and domain, and are stored (or at least, backed up to) somewhere that you own yourself. It can act as a standalone thing that you keep on a website, or you can extend it to sync to other platforms like Mastodon and Twitter.
Why do I need one?
You might not, but they’re fun to build, easy-ish to maintain, and a great first project for anyone who wants to fuck around with cool technology.
Who is this article for?
This isn’t an absolute beginners article. You’d benefit from having some basic knowledge of HTML, CSS, and JavaScript. You don’t need to be super up-to-speed on Svelte, but I won’t be giving a full 101 or anything like that. If you’re the type of person who likes meticulous and well-argued abstracts, this also isn’t for you; there’s tonnes of docs and RFCs that you can read to get that!
You should be comfortable opening a Terminal of some kind and knowing the super basics (if you can cd around a project folder and npm install some shit you’ll be fine).
This is very much intended to be a ‘try and build something fun with some cool technology and see if it’s for you’ kind of thing. We’ll quickly go from nothing to something, and then you can delve deeper and optimise it for your own needs with some further fucking around and learning.
If that sounds like something you’re down for, grab a beverage, settle in, and let’s fuckin go.
What are we building?
We’re going to be building a super basic implementation of a microblog – a bunch of posts, in a list, on a page, of a website.
We’ll then expand it a little towards the end to include some fun stuff like storing and parsing markdown instead of plain text, being able to give posts titles, and how we might set it up to cross-post to other services.
The gist is:
- A Svelte site, that pulls posts from…
- a PlanetScale database, that’s interfaced via…
- Prisma, which is our ORM of choice.
I don’t want to dwell too much on each of these. They’re my preferred tools for prototyping – and they scale extremely well if you ever want to do ‘Real Shit’ with them. If you want a full comparison and arguments for why each one is The Absolute Best™ then this ain’t it.
Note: you could just as easily build this using flat .md files for each post if you wanted to skip the whole database shit. For now, we'll use it, because it's a little more ‘realistic’ and I think it's worth the effort.
What I will say is that this ‘stack’ (🤢) lends itself really well to a ‘learn as you build’ approach; which is the only way things seem to stick in my dense lil head. So let’s go!
What you’ll need…
Let’s install some shit.
If you haven’t already, you’ll want to make sure you’ve got Node and npm (or yarn, or whatever, I’m not your dad) installed. We’ll sort the rest out as we go.
Getting the basic frontend in place
Our first stop on this magical microblog journey is to generate the bare bones of our Svelte frontend.
We’ll be using SvelteKit for this. It’s an awesome way to bootstrap Svelte apps and gives some really powerful options in terms of server-side rendering (SSR), routing, global layouts, and even a nifty way to write API functions that can be called anywhere else in your app.
Think of SvelteKit like the Svelte version of Next.js if it helps you sleep better at night.
Creating our app
Open your terminal of choice, cd to wherever you want to work from, and run:
npm create svelte@latest microblog(Change microblog to whatever you want your folder to be named.)
This will run you through the SvelteKit setup, and you’ll be able to select the starting point that makes sense for you. You can pick whatever you want, but for this tutorial we’re going to keep it simple and go with Skeleton project.
You’ll also be asked a few more things, like if you want to use TypeScript, ESLint, Prettier, Playwright, and Vitest. If you know what any of these are and you know you need them, use them! If you’re not sure, just say No and enjoy your life. It’s not that big a deal.
Once the creator has done its thing, you can get everything up and running:
cd microblog
npm install
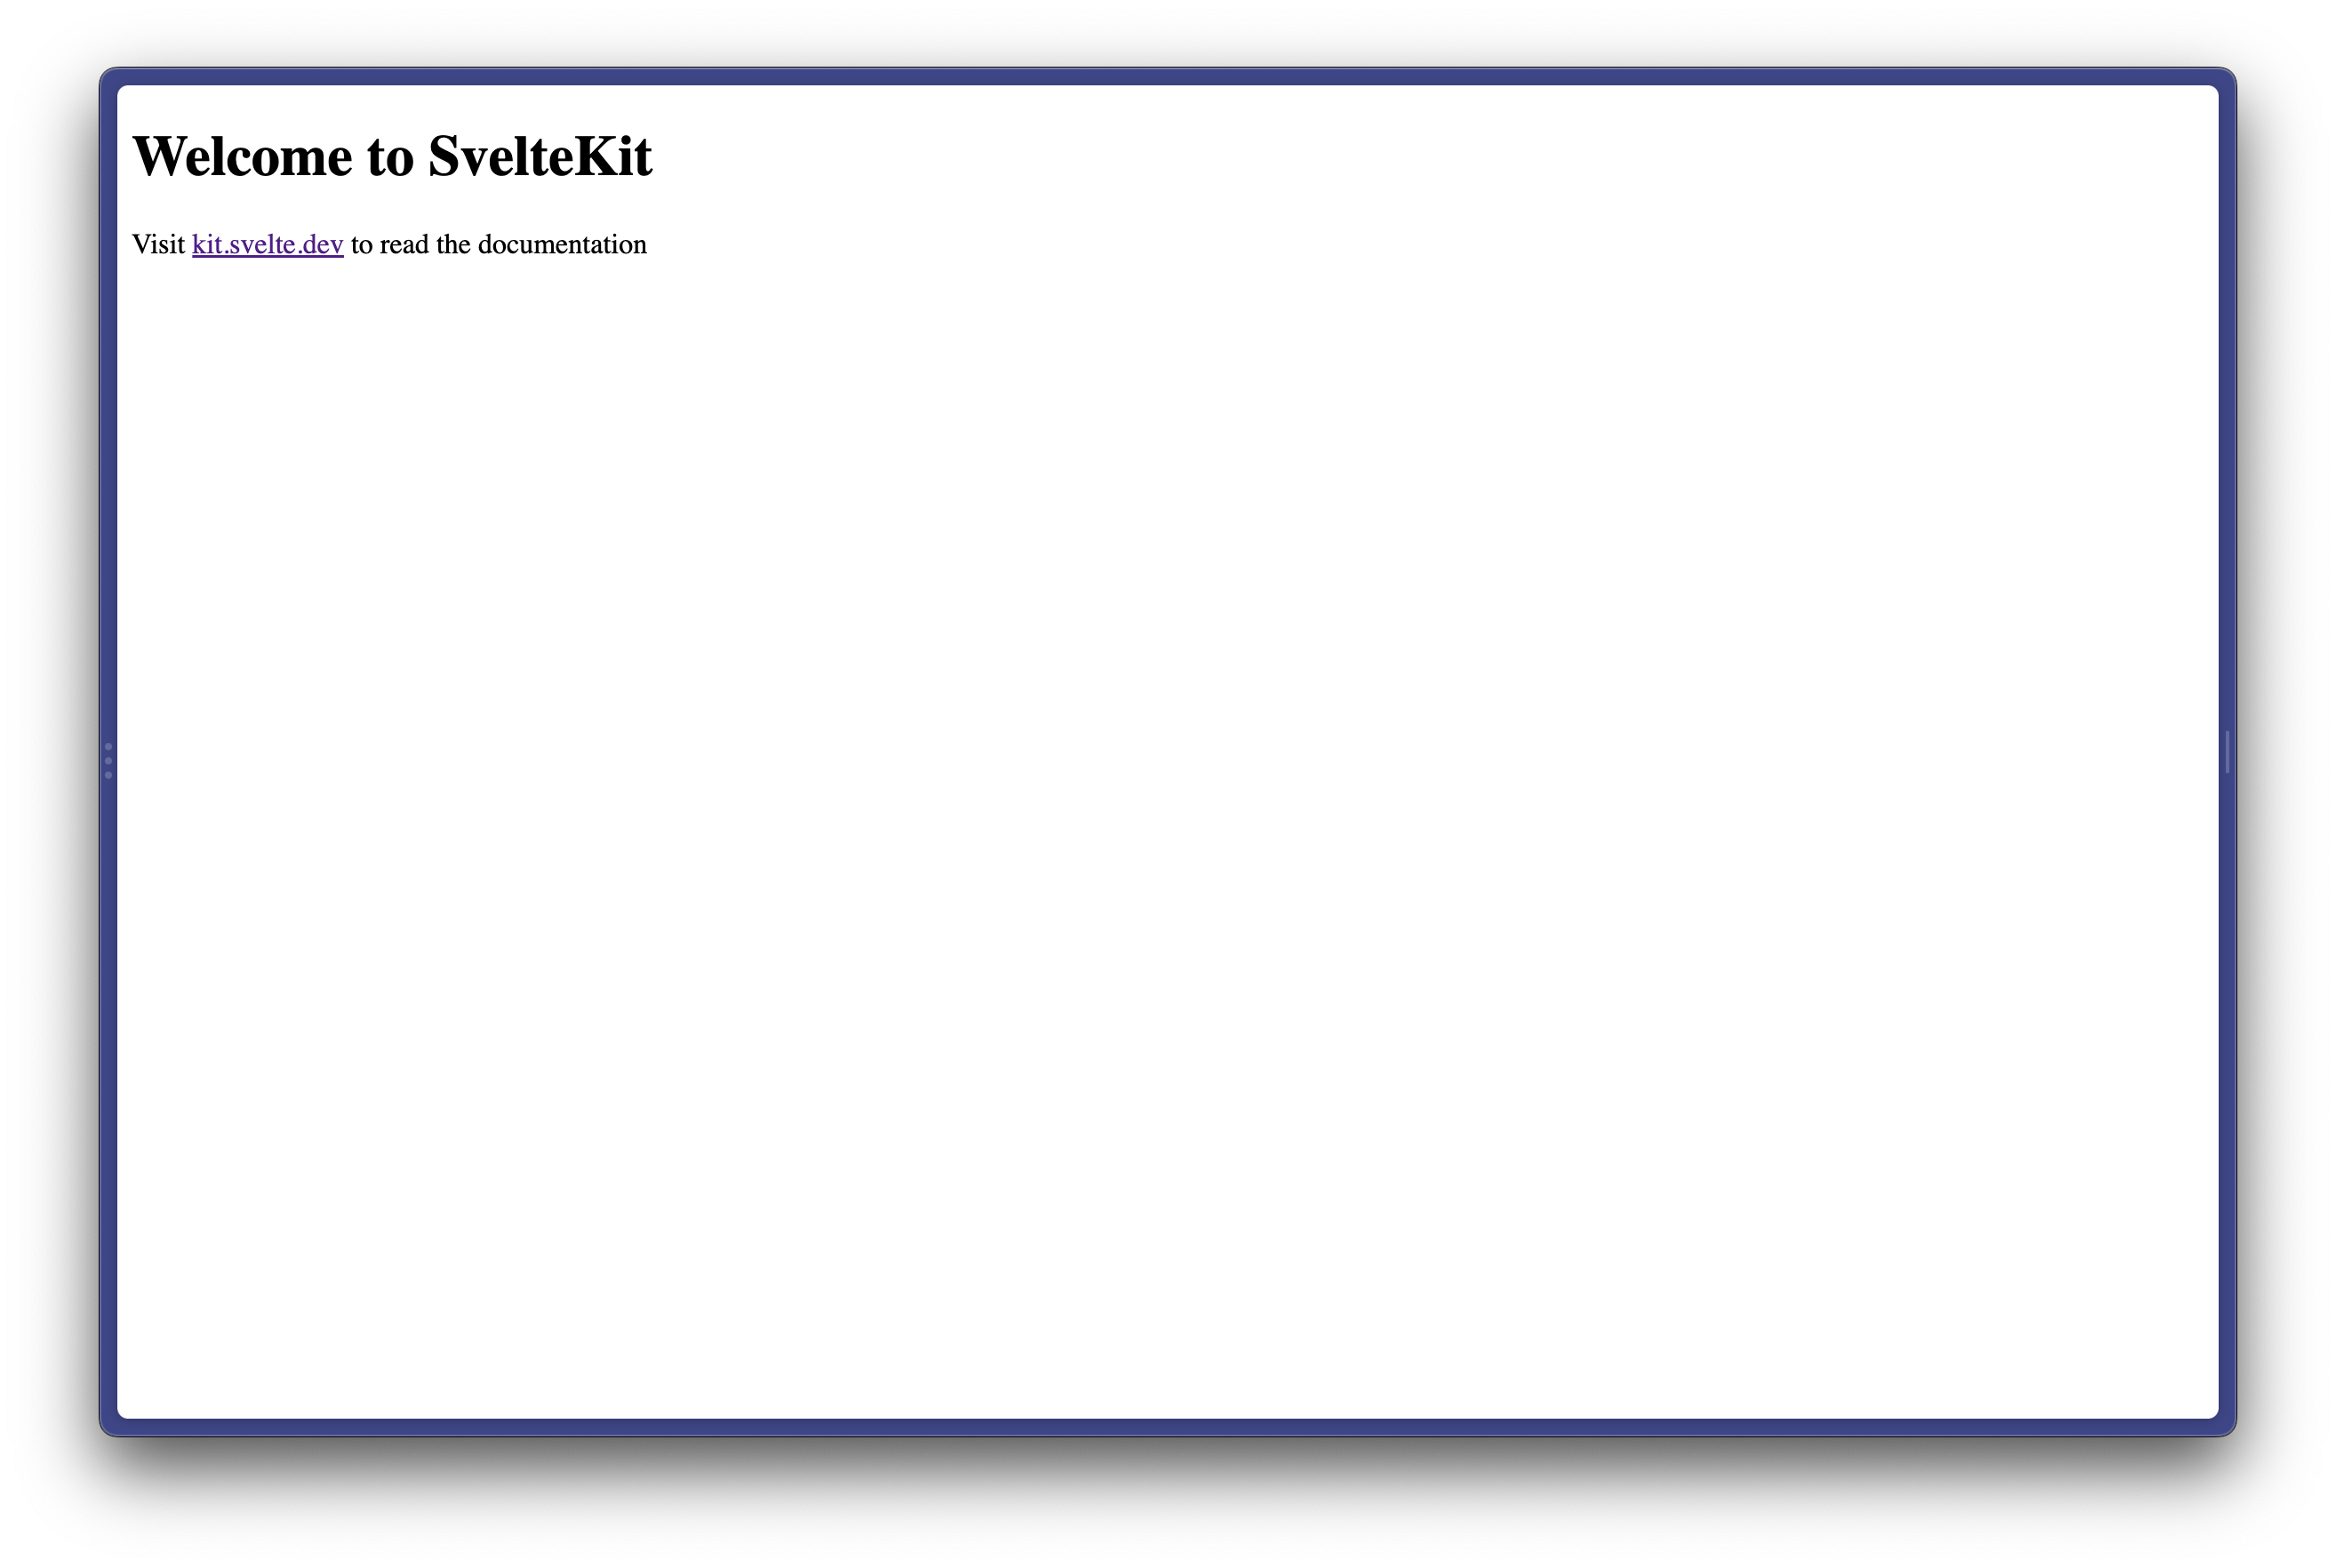
npm run devAccess the dev server in your browser and you should see something that looks like this:
Getting our bearings
Okay. So if you’ve opened up your folder in your IDE/editor of choice, you might be asking ‘what the fuck is all this?’.
I’ll elaborate on a few concepts as we go, but I don’t want to turn this into a whole ass SvelteKit beginners tutorial, so I really encourage y’all to check out the SvelteKit docs. They’re really good.
Let’s take a look at the folders and files we need to give a fuck about right now. You’ll see a folder structure that’s a little like this (excluding config, package, and helper files):
microblog/
|____app.js
|____static/
| |____favicon.png
|____src/
| |____routes/
| | |____+page.svelte
| |____app.html
Firstly, in /src/app.html you’ll find your HTML scaffolding. Like any standard HTML file, you can add <link>s to stylesheets, load in Google Fonts, etc. etc.
My main advice with app.html is to just leave it alone, unless you do want to add link, meta, etc. tags. I’m not gonna stop you loading in Inter like the cool kids and doing a tonne of global styles, but it’s not the point of this post. Feel free to fuck around with that side of things and pop back!
The /src/routes/ folder is where we’ll be spending most of our time, and you’ll find a +page.svelte file in there. This is a specially-named file that kinda acts like an index.html file would in a directory. Any route can have a +page.svelte in it, and if you access {your-svelte-site}/{route}, the +page.svelte file will dictate what gets shown.
There's a lot of discussion out there about the whole ‘+page’ naming shenanigans in the SvelteKit project structure. Some people hate it. It's fine. You’ll get used to it.
Creating a Posts page
In the src/routes folder, create a folder called posts and create a blank file called +page.svelte (yes the + matters!) inside it.
This is a cool time to stop and take a look at how Svelte files are formatted. If you’re used to vanilla web coding then you might feel right at home. If you’re more used to React or other frameworks, it might feel a little weird to work with something with such little (visible) boilerplate.
To render content into a Svelte page, you… write HTML. Amazing, right?
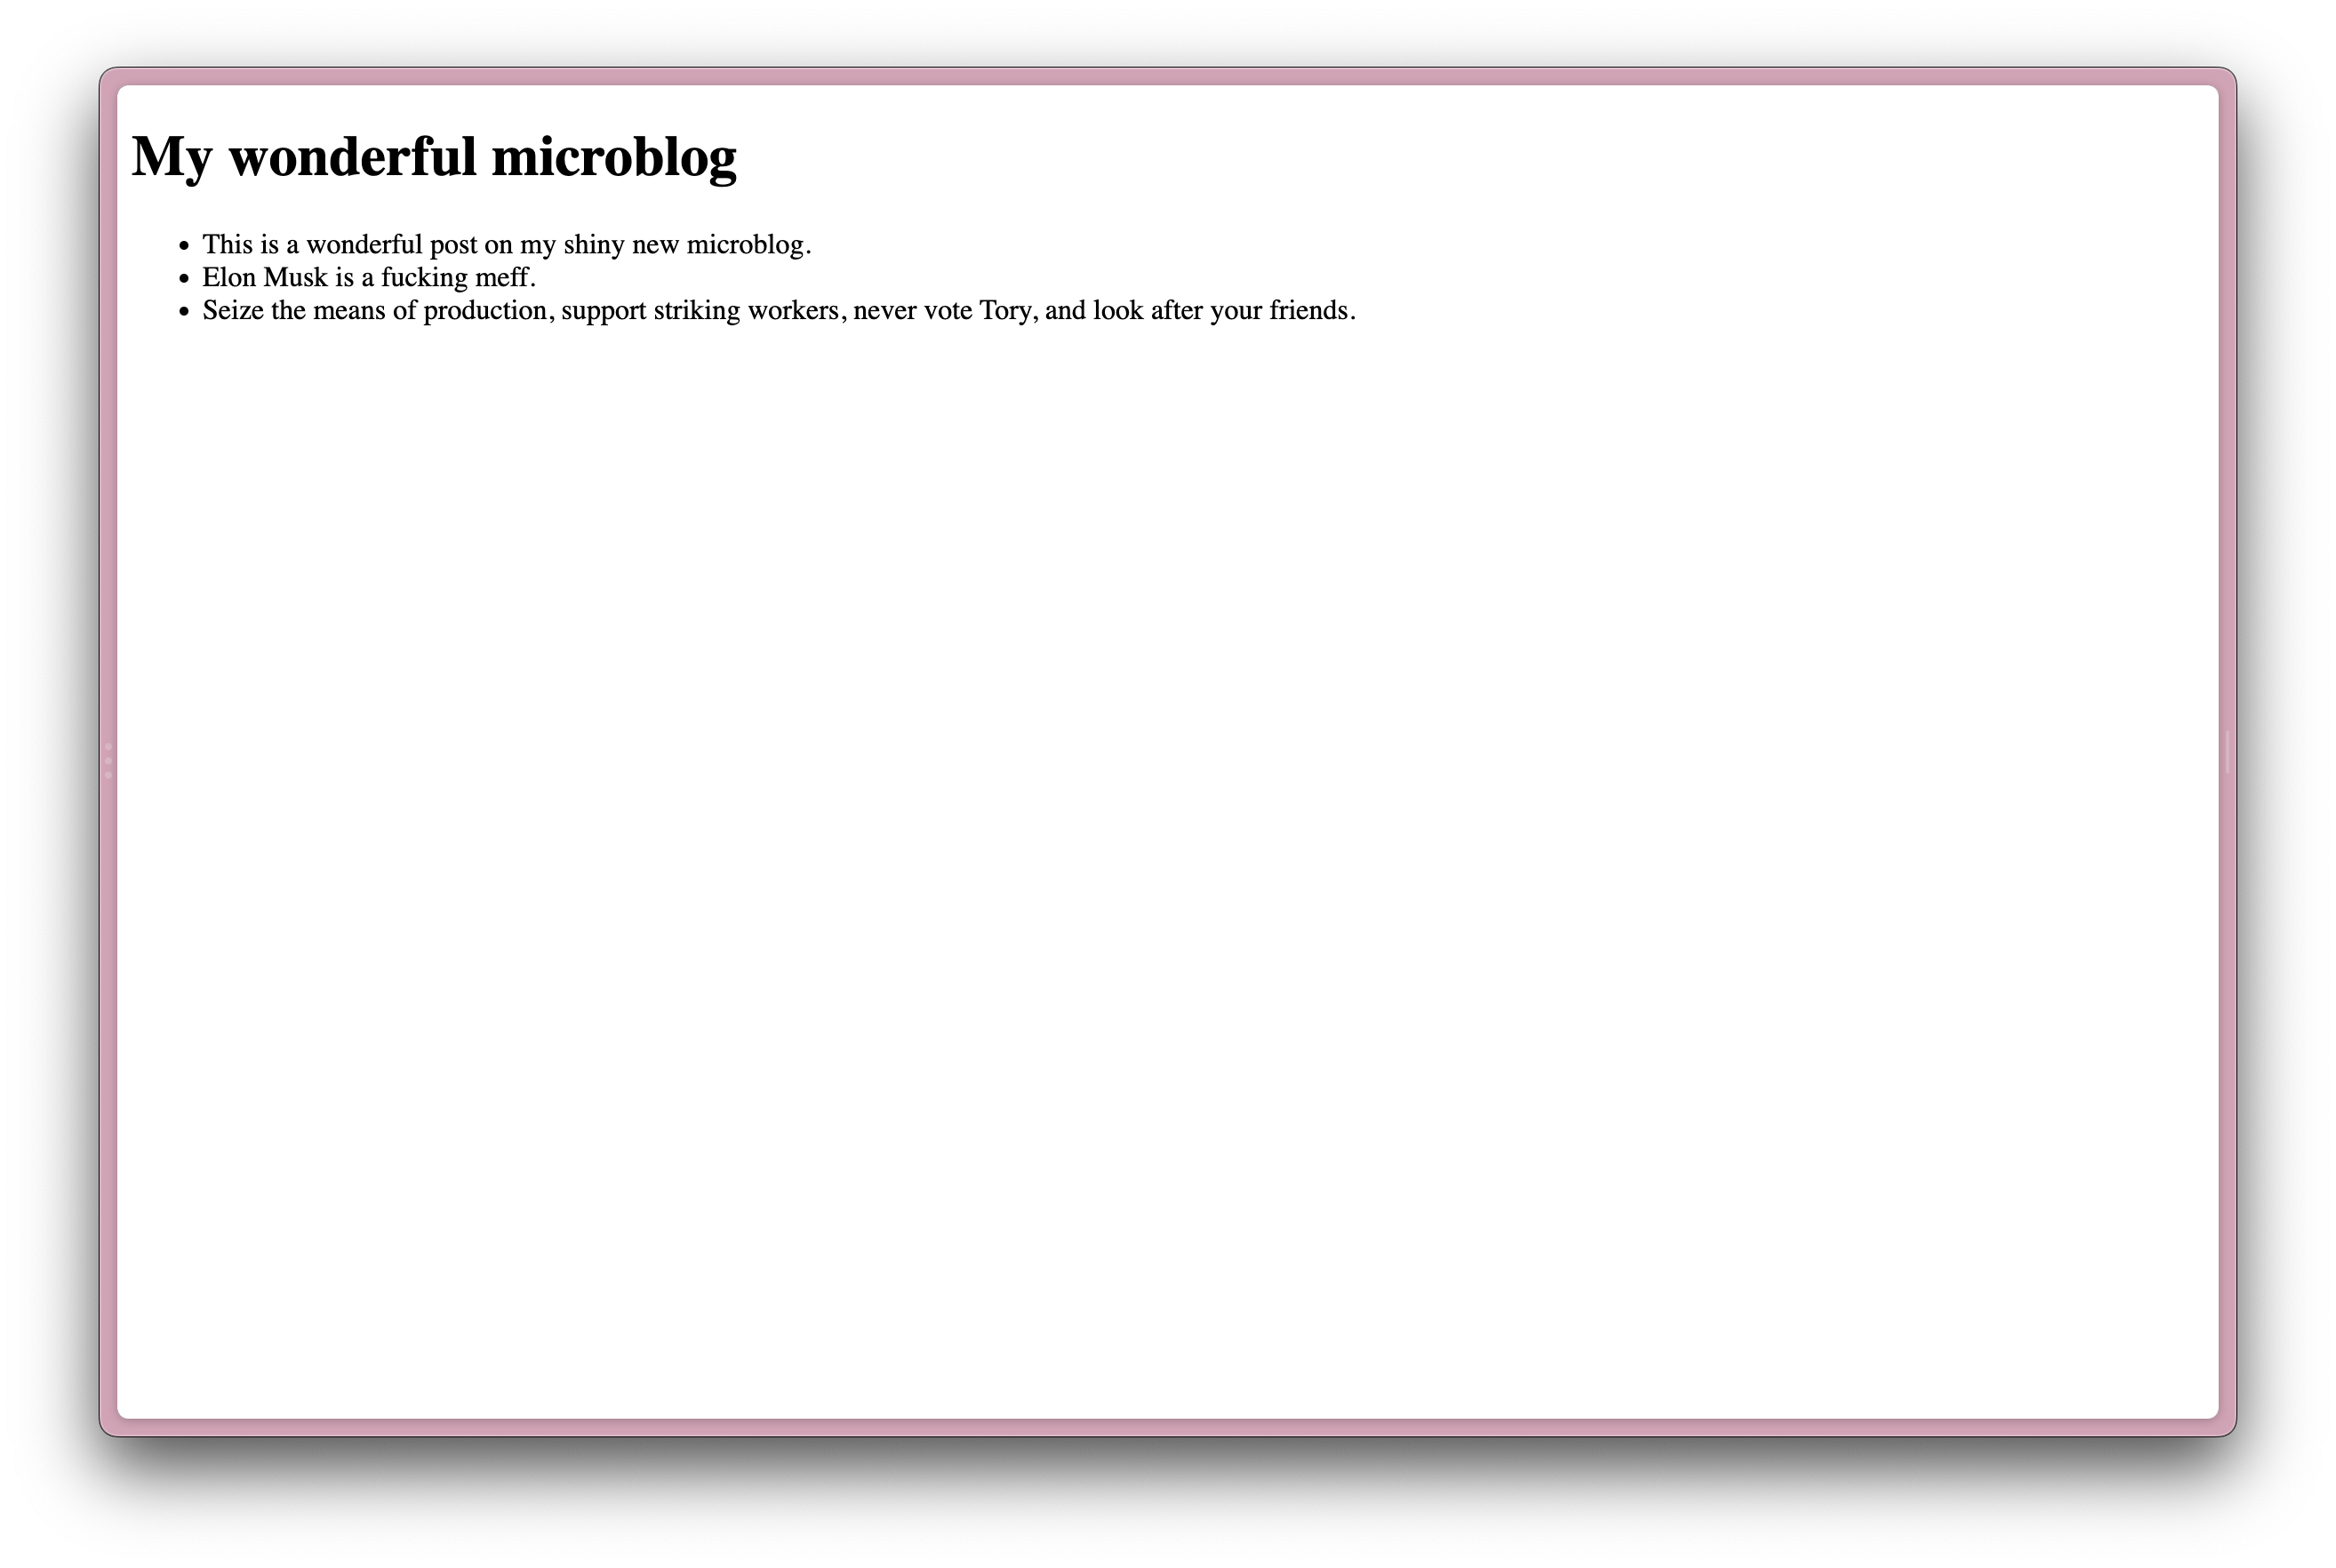
Add the following to your currently-empty src/routes/posts/+page.svelte file:
<h1>My wonderful microblog</h1>
<ul class="posts">
  <li>This is a wonderful post on my shiny new microblog.</li>
  <li>Elon Musk is a fucking meff.</li>
  <li>Seize the means of production, support striking workers, never vote Tory, and look after your friends.</li>
</ul>
Then navigate to /posts on your dev server, and you should get something that looks like this:
Scoping styles
With Svelte, you have a few decent options when it comes to styling:
- Write global styles in standalone CSS – usually in some kind of
main.cssfile - Write global styles in a Svelte context – usually in some kind of top-level
layoutfile - Write scoped styles in your Svelte pages/components
You can, if you like, combine any and all of these approaches. I prefer a mixture of 1. and 3.
I write some very broad, global styles into a main.css file, for things like CSS resets, global typography and colors, and any CSS custom properties I want to set on the :root.
Then I’ll write my component-specific CSS in my Svelte components and pages themselves.
If you use Tailwind or any other utility CSS then you might want to take a different approach. I don’t really give a fuck about Tailwind and I give less of a fuck about how you structure your CSS – just know there are options and follow your heart.
Anyway, for the purpose of this tutorial, let’s write some scoped styles (with a cheeky lil global fucker as a hacky reset) into our Posts page.
Put the following at the very bottom of your src/posts/+page.svelte file:
<style>
  :global(body) {
    margin: 0;
    padding: 0;
    font-family: -apple-system, BlinkMacSystemFont, 'Segoe UI', Roboto, Oxygen, Ubuntu, Cantarell, 'Open Sans', 'Helvetica Neue', sans-serif;
  }
  .posts,
  h1 {
    width: 90%;
    margin: auto;
    max-width: 480px;
    padding: 0;
  }
  h1 {
    margin-top: 4rem;
    margin-bottom: 2rem;
  }
  .posts li {
    list-style: none;
    border-bottom: 1px solid #f2f2f2;
    margin: 0;
    padding: 0;
    margin-bottom: 2rem;
    padding-bottom: 2rem;
  }
</style>
Using the :global modifier in a file so deeply nested isn't good practice. It just keeps this tutorial lean and easier to follow. Preferably you'd set your global styles in a top-level, predictable location. No one wants to go hunting for global CSS rules.
In the above example, the .posts and .posts li selectors will be scoped to this page. Any time you use a <style> tag without the global property in a .svelte file, this will be the case.
This means you can feasibly have a <div class="posts"> in a completely different location or context, and none of these styles would apply. I’m not sure why you would do that. But go fucking wild lads we’re protected now.
Anyway, your Posts page should look like this now:
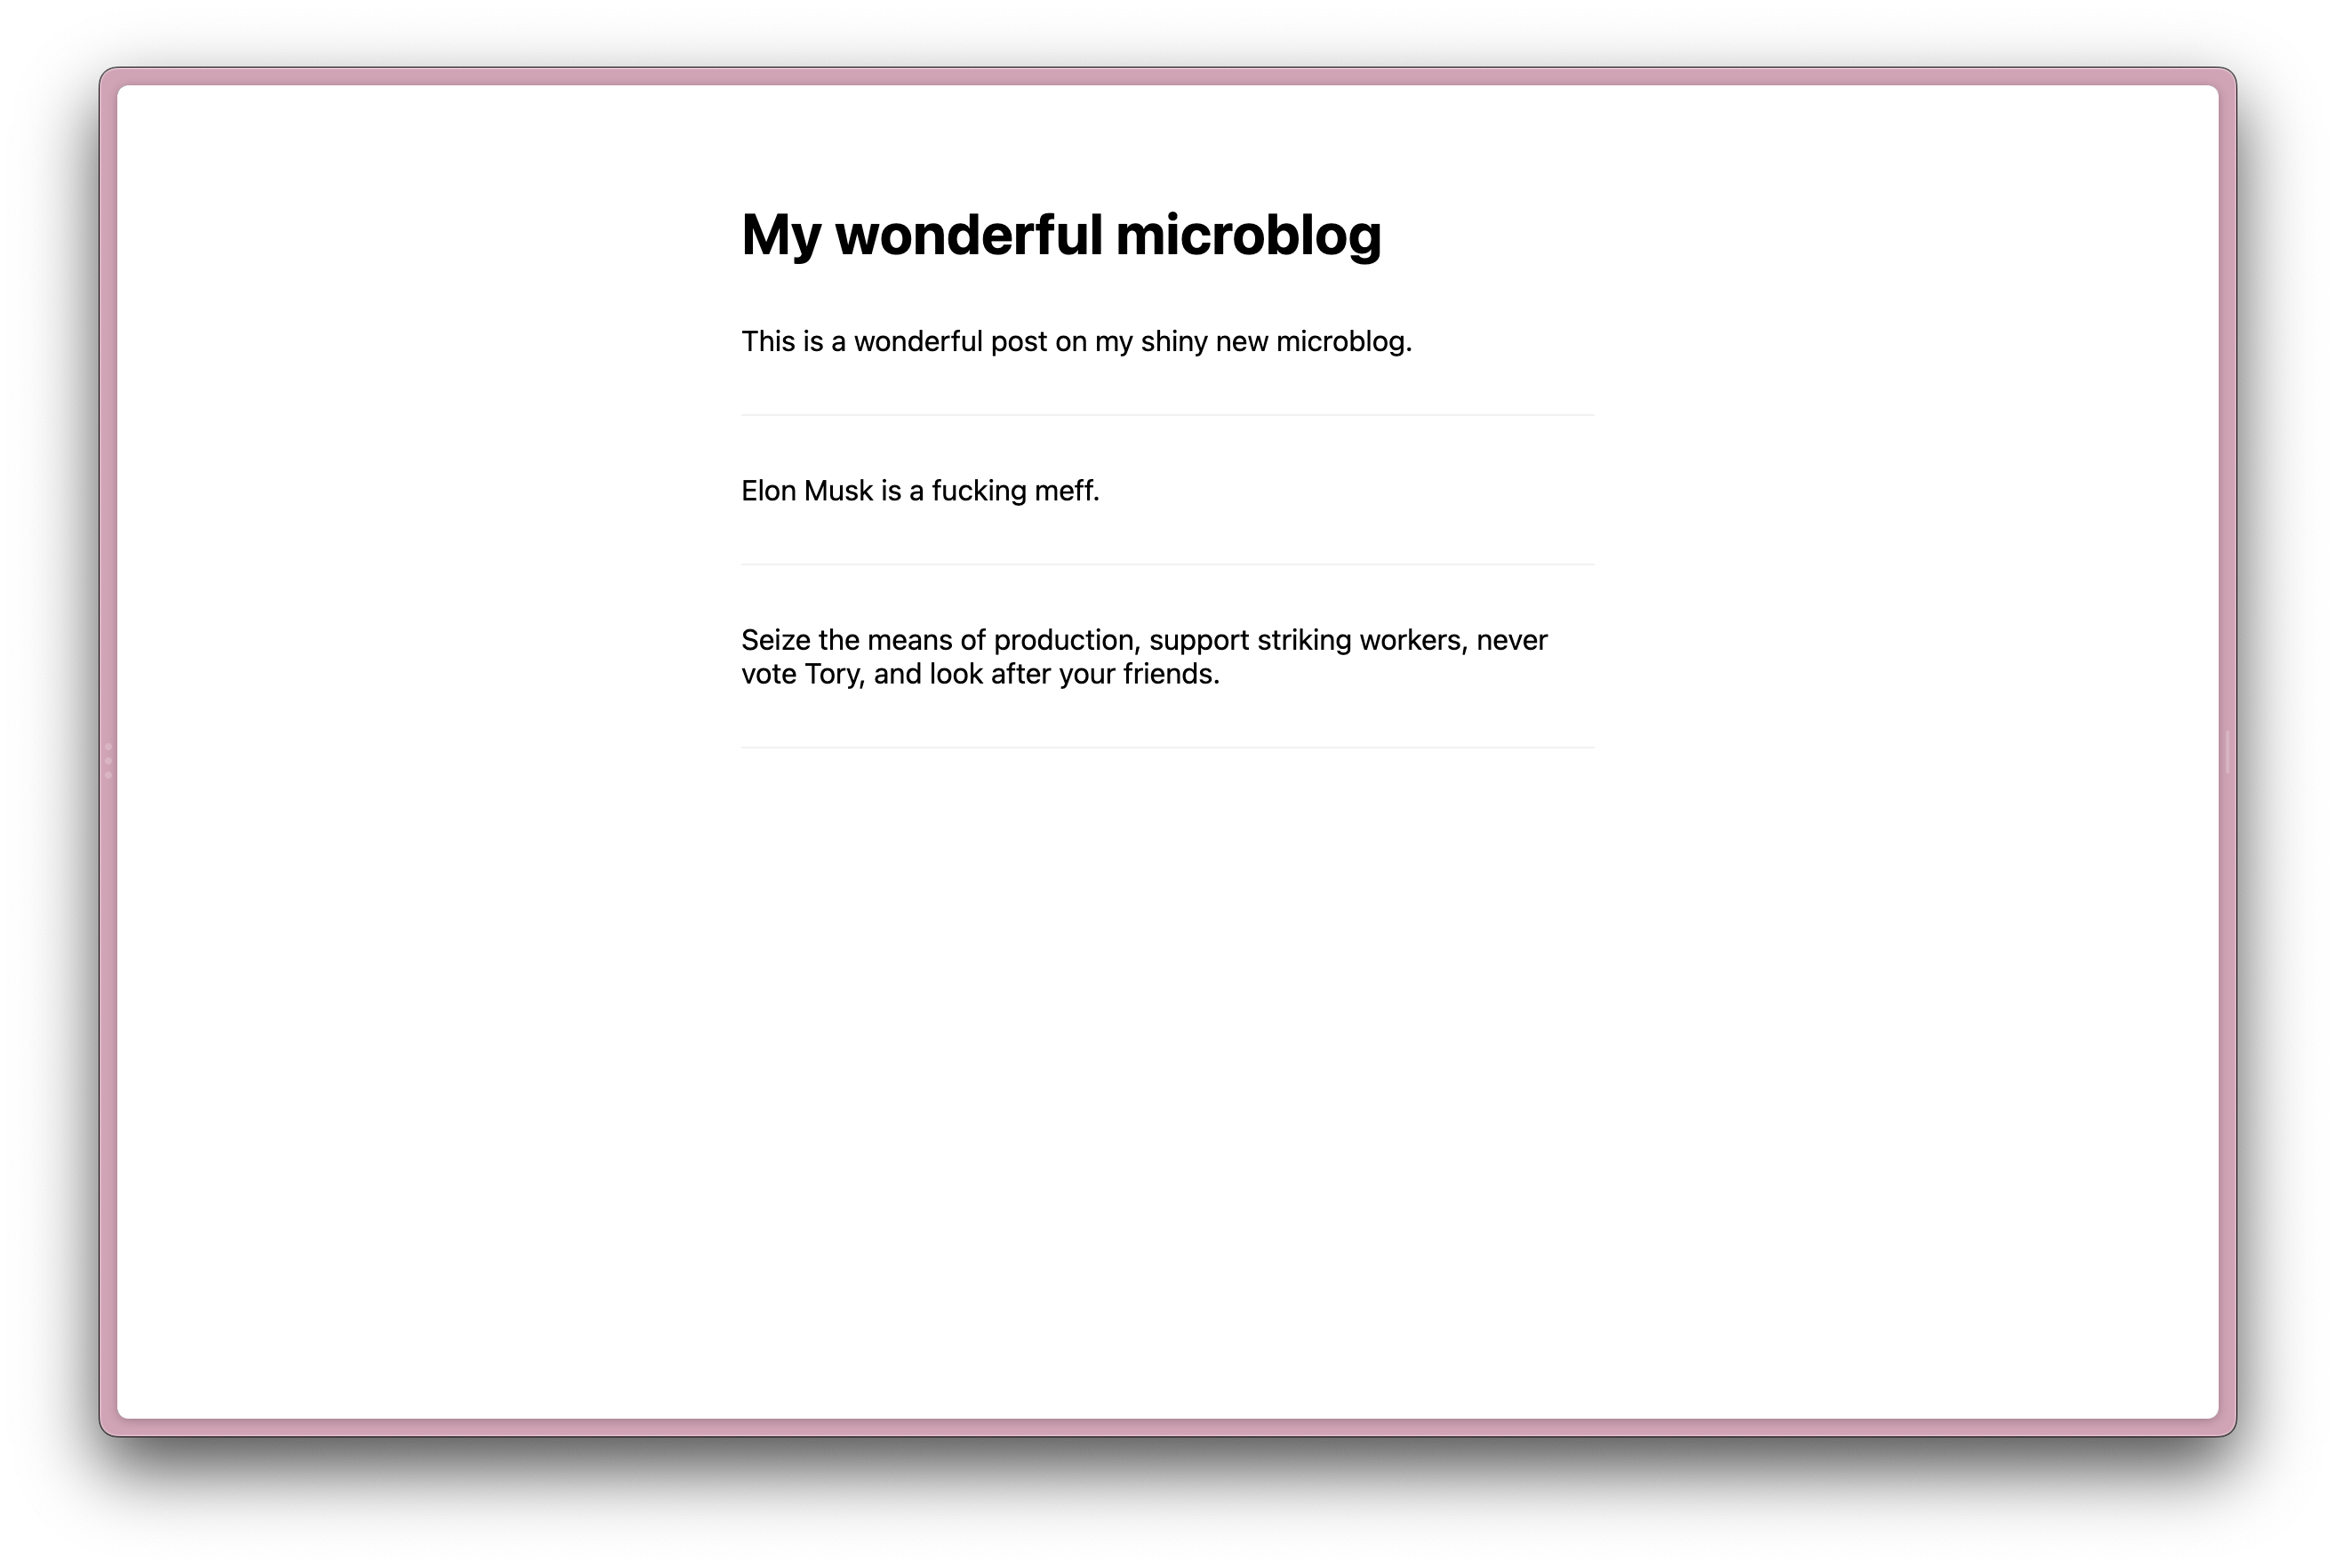
Absolutely smashing.
Let’s mock some data
Okay, we’ve got a stunning and brave posts page now. But it’s just three posts, and they’re hard-coded, and they seem to want to turn you into a socialist. Let’s get our own data into this structure.
We’ll start by getting some mock data rendering so we can dive into a couple of fancy SvelteKit concepts.
The first step to doing this is to create a +page.js file inside our src/routes/posts/ folder.
Add the following code to this file:
export const load = async () => {

  const posts = [
    {
      createdAt: Date.now(),
      text: 'This is a wonderful post on my shiny new microblog.',
    },
    {
      createdAt: Date.now(),
      text: 'This is a second wonderful post on my shiny new microblog.',
    },
    {
      createdAt: Date.now(),
      text: 'This is a third wonderful post on my shiny new microblog.',
    }
  ]

  return {
    posts
  }
}
So, what’s happening here?
Having +page.js (notice the .js extension and not the .svelte extension) as a sibling to the +page.svelte file – and ensuring it exposes a load() function – allows us to pass data into the page. Anything that gets returned from the load() function will be accessible in the page via a data property.
To reference this data, we need to change our +page.svelte file. Specifically, we need to add the following to the very top of our file.
<script>
  export let data
</script>
So right now we have a +page.js file with a load() function; and a +page.svelte file with a data prop, ready to receive whatever we return from load().
Our entire file should now look like this:
<script>
export let data
</script>
<h1>My wonderful microblog</h1>
<ul class="posts">
<li>This is a wonderful post on my shiny new microblog.</li>
<li>Elon Musk is a fucking meff.</li>
<li>Seize the means of production, support striking workers, never vote Tory, and look after your friends.</li>
</ul>
<style>
:global(body) {
margin: 0;
padding: 0;
font-family: -apple-system, BlinkMacSystemFont, 'Segoe UI', Roboto, Oxygen, Ubuntu, Cantarell, 'Open Sans', 'Helvetica Neue', sans-serif;
}
.posts,
h1 {
width: 90%;
margin: auto;
max-width: 480px;
padding: 0;
}
h1 {
margin-top: 4rem;
margin-bottom: 2rem;
}
.posts li {
list-style: none;
border-bottom: 1px solid #f2f2f2;
margin: 0;
padding: 0;
margin-bottom: 2rem;
padding-bottom: 2rem;
}
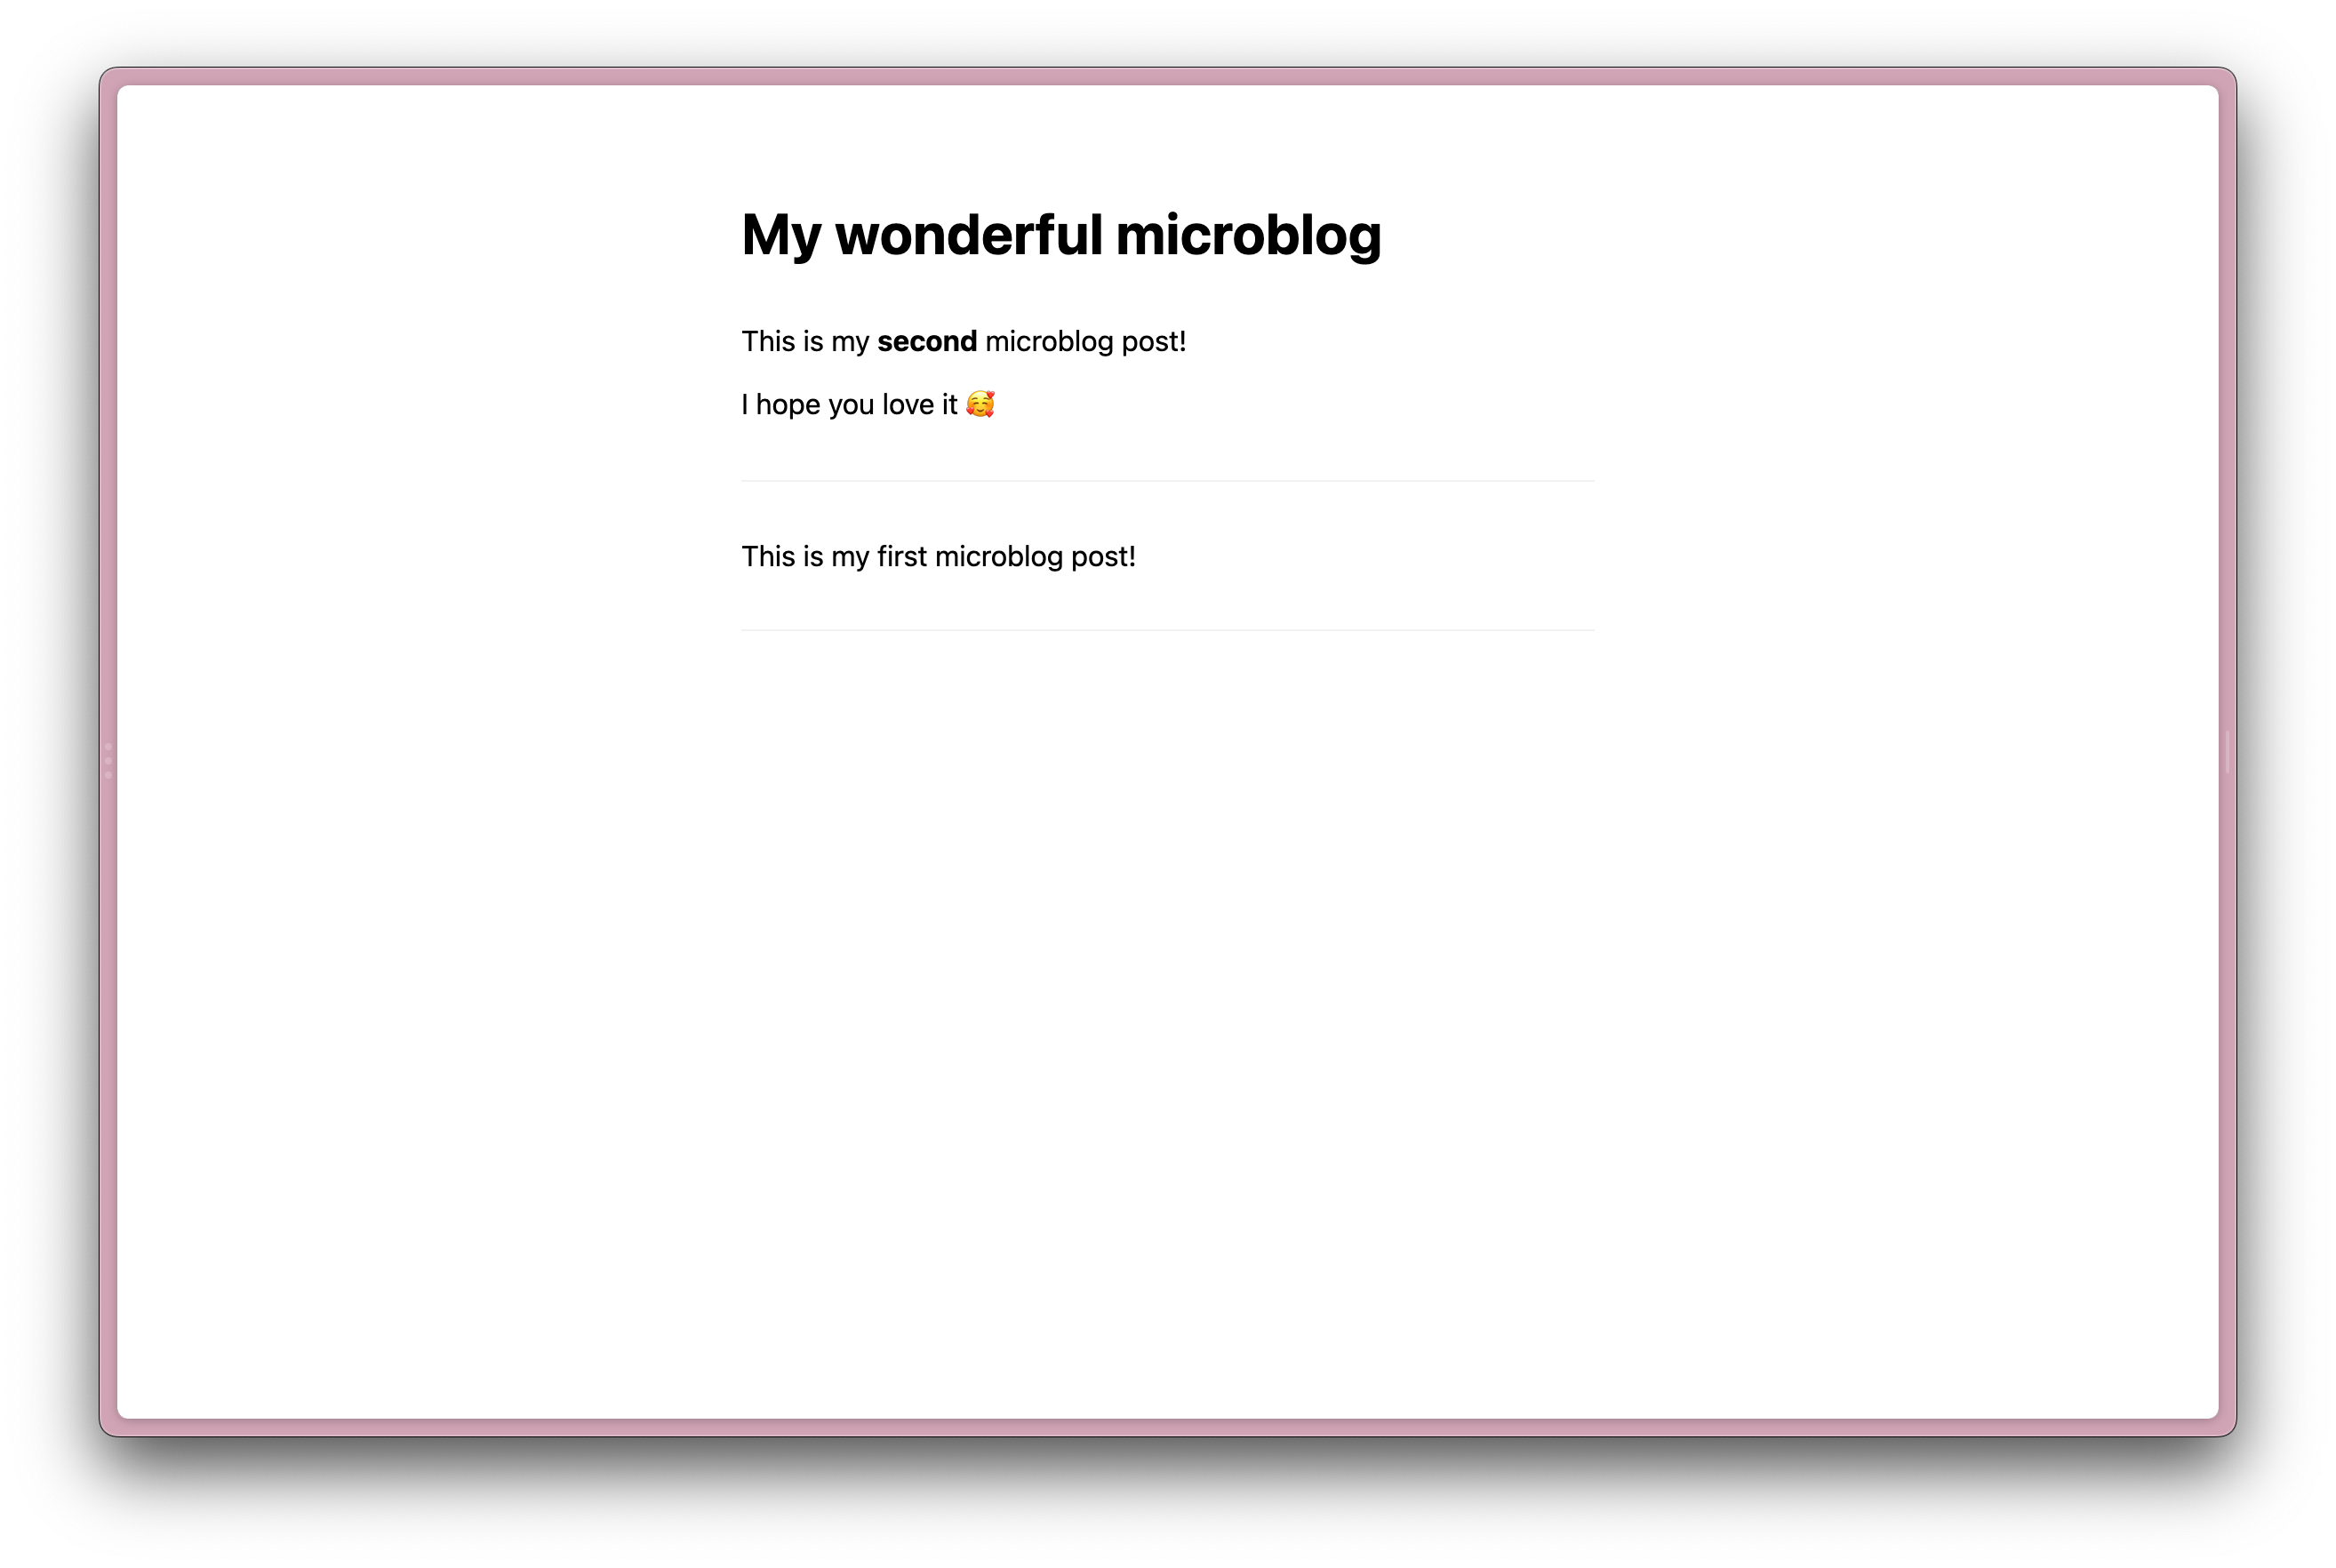
</style>Finally, let’s make this dynamic! We’re going to use some Svelte templating to loop through our posts. Hold on to your Handlebars.
Here’s the full file, replacing our hard-coded list with a nice each loop.
<script>
  export let data
</script>

<h1>My wonderful microblog</h1>
<ul class="posts">
  {#each data.posts as post}
    <li>{post.text}</li>
  {/each}
</ul>

<style>
  :global(body) {
    margin: 0;
    padding: 0;
    font-family: -apple-system, BlinkMacSystemFont, 'Segoe UI', Roboto, Oxygen, Ubuntu, Cantarell, 'Open Sans', 'Helvetica Neue', sans-serif;
  }
  .posts {
    width: 90%;
    margin: auto;
    max-width: 680px;
  }
  .posts li {
    list-style: none;
    padding: 0 1rem;
    border-bottom: 1px solid #fafafa;
  }
</style>
The {#each data.posts as post} is what matters here, and is how we loop through an array. The array in question is data.posts – which we get ‘for free’ by exposing the load() function in the +page.js file.
Passing data through a load function like this is a powerful and important pattern in SvelteKit, but it mightn't be super intuitive if this is your first time seeing it! Don’t worry if this doesn’t feel obvious, or if it’s not clicking straight away.
And with that, we’re done with the first stage! We have a website, with a posts/ page, that renders some posts. Well done on making it this far. Here’s a picture of my dog.

Stage 2: Setting up our database
We’ll be using PlanetScale for our database, with Prisma as our ORM.
If databases and ORMs and queries and SQL is daunting to you – don’t worry too much! Modern database tooling has taken huge strides in recent years, and a combo like PlanetScale and Prisma can make data management feel like any other ‘straightfoward’ coding endeavour.
Go get a PlanetScale account
Sign up for PlanetScale, create an organization, and create a database. See ya in a sec xxx
Once you’ve created a database, create a .env file at the root of your microblog project. Add the following line:
DATABASE_URL="{your-database-url}"Where {your-database-url} is the connection URL provided by PlanetScale.
You can find your connection string by hitting the 'Connect' button in the PlanetScale dashboard. If you’ve already seen and dismissed this, your password will be obfuscated. If this is the case, access your ‘password settings’ to copy it – then replace all the ‘*‘s in your connection URL with your real password.
Install Prisma
Because SvelteKit lets us write server-side code, we’re going to stay in our microblog folder that we’ve known as home for the minutes/hours/84 years we’ve been working through this project.
We’re going to add the Prisma core library to our project, as well as the Prisma client. This will allow us to interact with our PlanetScale data, via Prisma, in our SvelteKit files.
First, let’s install Prisma:
npm install prisma --save-devThen, install the Prisma client:
npm install @prisma/clientAnd, finally, init Prisma in our project
npx prisma initThis will create a prisma folder, with a schema.prisma file inside. Update your schema file to include the following:
datasource db {
  provider      = "mysql"
  url           = env("DATABASE_URL")
  relationMode  = "prisma"
}

generator client {
  provider = "prisma-client-js"
}

model Post {
  id              Int       @default(autoincrement()) @id
  text            String    @db.VarChar(600)
  createdAt       DateTime  @default(now())
}
Setting the provider to mysql means it’ll play nice with PlanetScale, setting the url to the environment variable we initialised before will let us connect, and the model Post { stuff at the bottom lets us describe the data we want to store for each post in our database.
We can now push our Prisma schema to PlanetScale:
npx prisma db pushThis will make sure our PlanetScale database is ready for us to throw data at it. Speaking of which…
Adding data
There are a bunch of ways you can add data into your PlanetScale database, but for now we’re going to make use of Prisma’s awesome Studio. Prisma Studio is a lightweight local app that you can run from a ny project that has Prisma set up and a valid database connection. In your microblog project, run:
npx prisma studioThis will load Prisma Studio in your browser, and you can start fucking with your data.
Maybe it goes without saying, but using a web app to fuck with your production data mightn’t be the best choice. For more mature projects you’ll want to take advantage of PlanetScale’s amazing branch protection features.
In Prisma Studio, select ‘Post’ from the ‘Open a Model’ screen. Hit the ‘Add Record’ button, and enter some text in the text column for your post. Hit the ‘Save 1 change’ button and congrats – you’ve just created your first post!
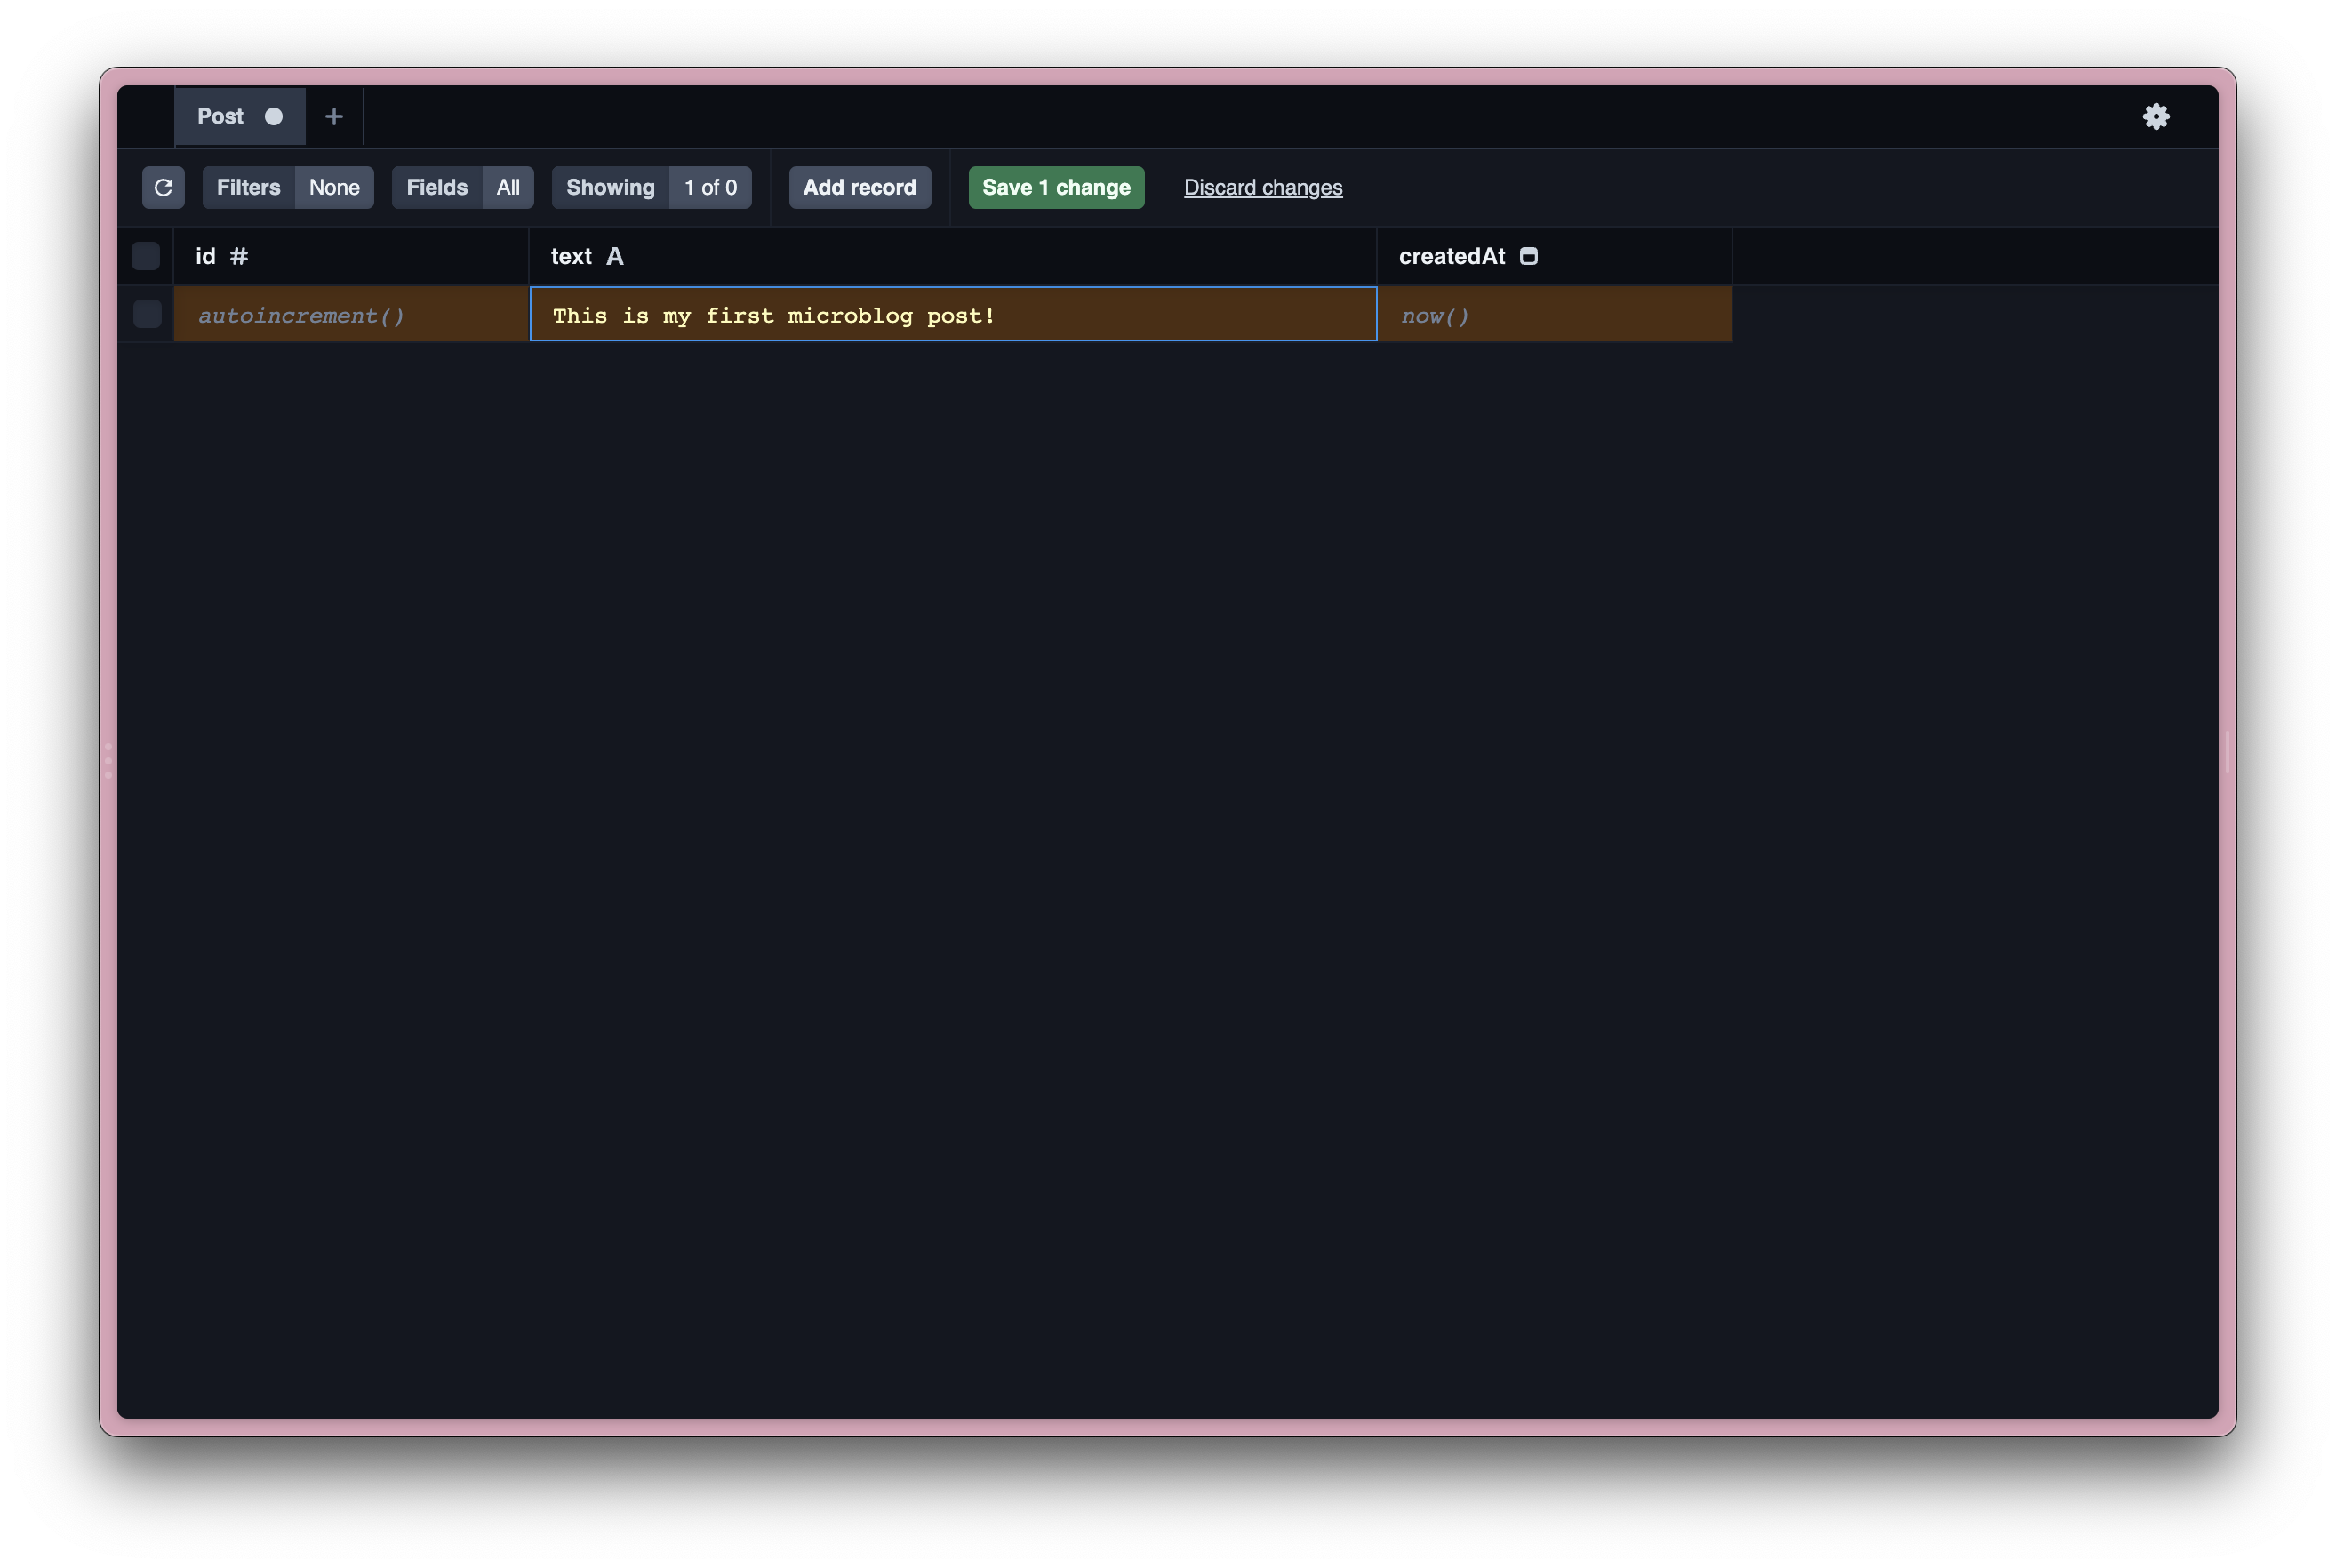
Repeat this a few more times to build up your fabulous list of microblog posts. Once you’re happy, it’s time to start using that data.
We ⚠️ will ⚠️ be nuking this data at some point during this tutorial. Don’t go wild and waste your time with shortform masterpieces here unless you want to manually back them up and restore.
Stage 3: pulling our data into a page
Okay then, back to the Svelte stuff.
We’re going to start by ensuring our calls to PlanetScale happen on the server. Currently, the logic in the load() function of our src/posts/+page.js file will be ran on the client side, before the content is rendered.
First, we’re going to rename src/posts/+page.js to +page.server.js. This tells SvelteKit that we want to run this code on the server, and it’ll throw an error if we try to run it from the client. This is really useful for things like fetching from a database, where you might not want to expose credentials.
Replace the +page.server.js content with the following:
import { PrismaClient } from '@prisma/client'
const prisma = new PrismaClient()

export const load = async () => {
  const posts = await prisma.post.findMany({
    orderBy: [
      { createdAt: 'desc' }
    ]
  })
  return {
    posts
  }
}
And then go take a look at your /posts page in your browser. You should see the posts you added in Prisma Studio instead of the old hard-coded ones.
And there we have it! You’ve basically got your own Twitter on your own site. It’s exactly the same. Kinda.
Stage 4: parsing markdown
Okay, so realistically we’re just spitting out a bunch of raw text into a list. We’re still a long way from having something that you’d describe as a ‘Twitter replacement’. On the flip-side, maybe this is exactly what you need; in which case, no need to carry on reading – go and enjoy life’s simplicities 💖
Okay, now that the MinimalWeb weirdos have gone, did anyone say markdown?!
We’re going to go with a pretty naive implementation of storing and parsing markdown here. We’ll still be storing it as plain text in PlanetScale, and we’ll be rendering it into Svelte components using Snarkdown.
First, let’s install Snarkdown into our microblog project:
npm install snarkdownChange the <script> tag at the top of src/routes/posts/+page.svelte to this:
  <script>
    import snarkdown from 'snarkdown'
    export let data
  </script>
Then, change the #each loop in the same file to this:
{#each data.posts as post}
  <li class="full-post">
    <div class="post-text">
      {@html
        post.text
        .split(/(?:\r?\n){2,}/)
          .map((l) =>
            [" ", "\t", "#", "-", "*", ">"].some((char) => l.startsWith(char))
              ? snarkdown(l)
              : `<p>${snarkdown(l)}</p>`
          )
          .join("\n")
      }
    </div>
  </li>
{/each}
Okay, yeah, there’s some weird shit going on here. Basically: if you want Snarkdown to parse double line-breaks as paragraphs, use this code (source). If you don’t care, you can use:
{#each data.posts as post}
  <li class="full-post">
    <div class="post-text">
      {@html snarkdown(post.text)}
    </div>
  </li>
{/each}
And get on with your life.
Add the following CSS to the <style> tag in +page.svelte just to fix any spacing weirdness:
:global(.posts li p:last-child) {
  margin-bottom: 0;
}
We use :global here because scoped styles only get applied to components local to the file. They don’t cascade to imported components. Because we’re using snarkdown to render content, if we want to target a processed element in CSS, we need to use :global. In cases like this, it’s good to be quite specific with your selectors, just in case.
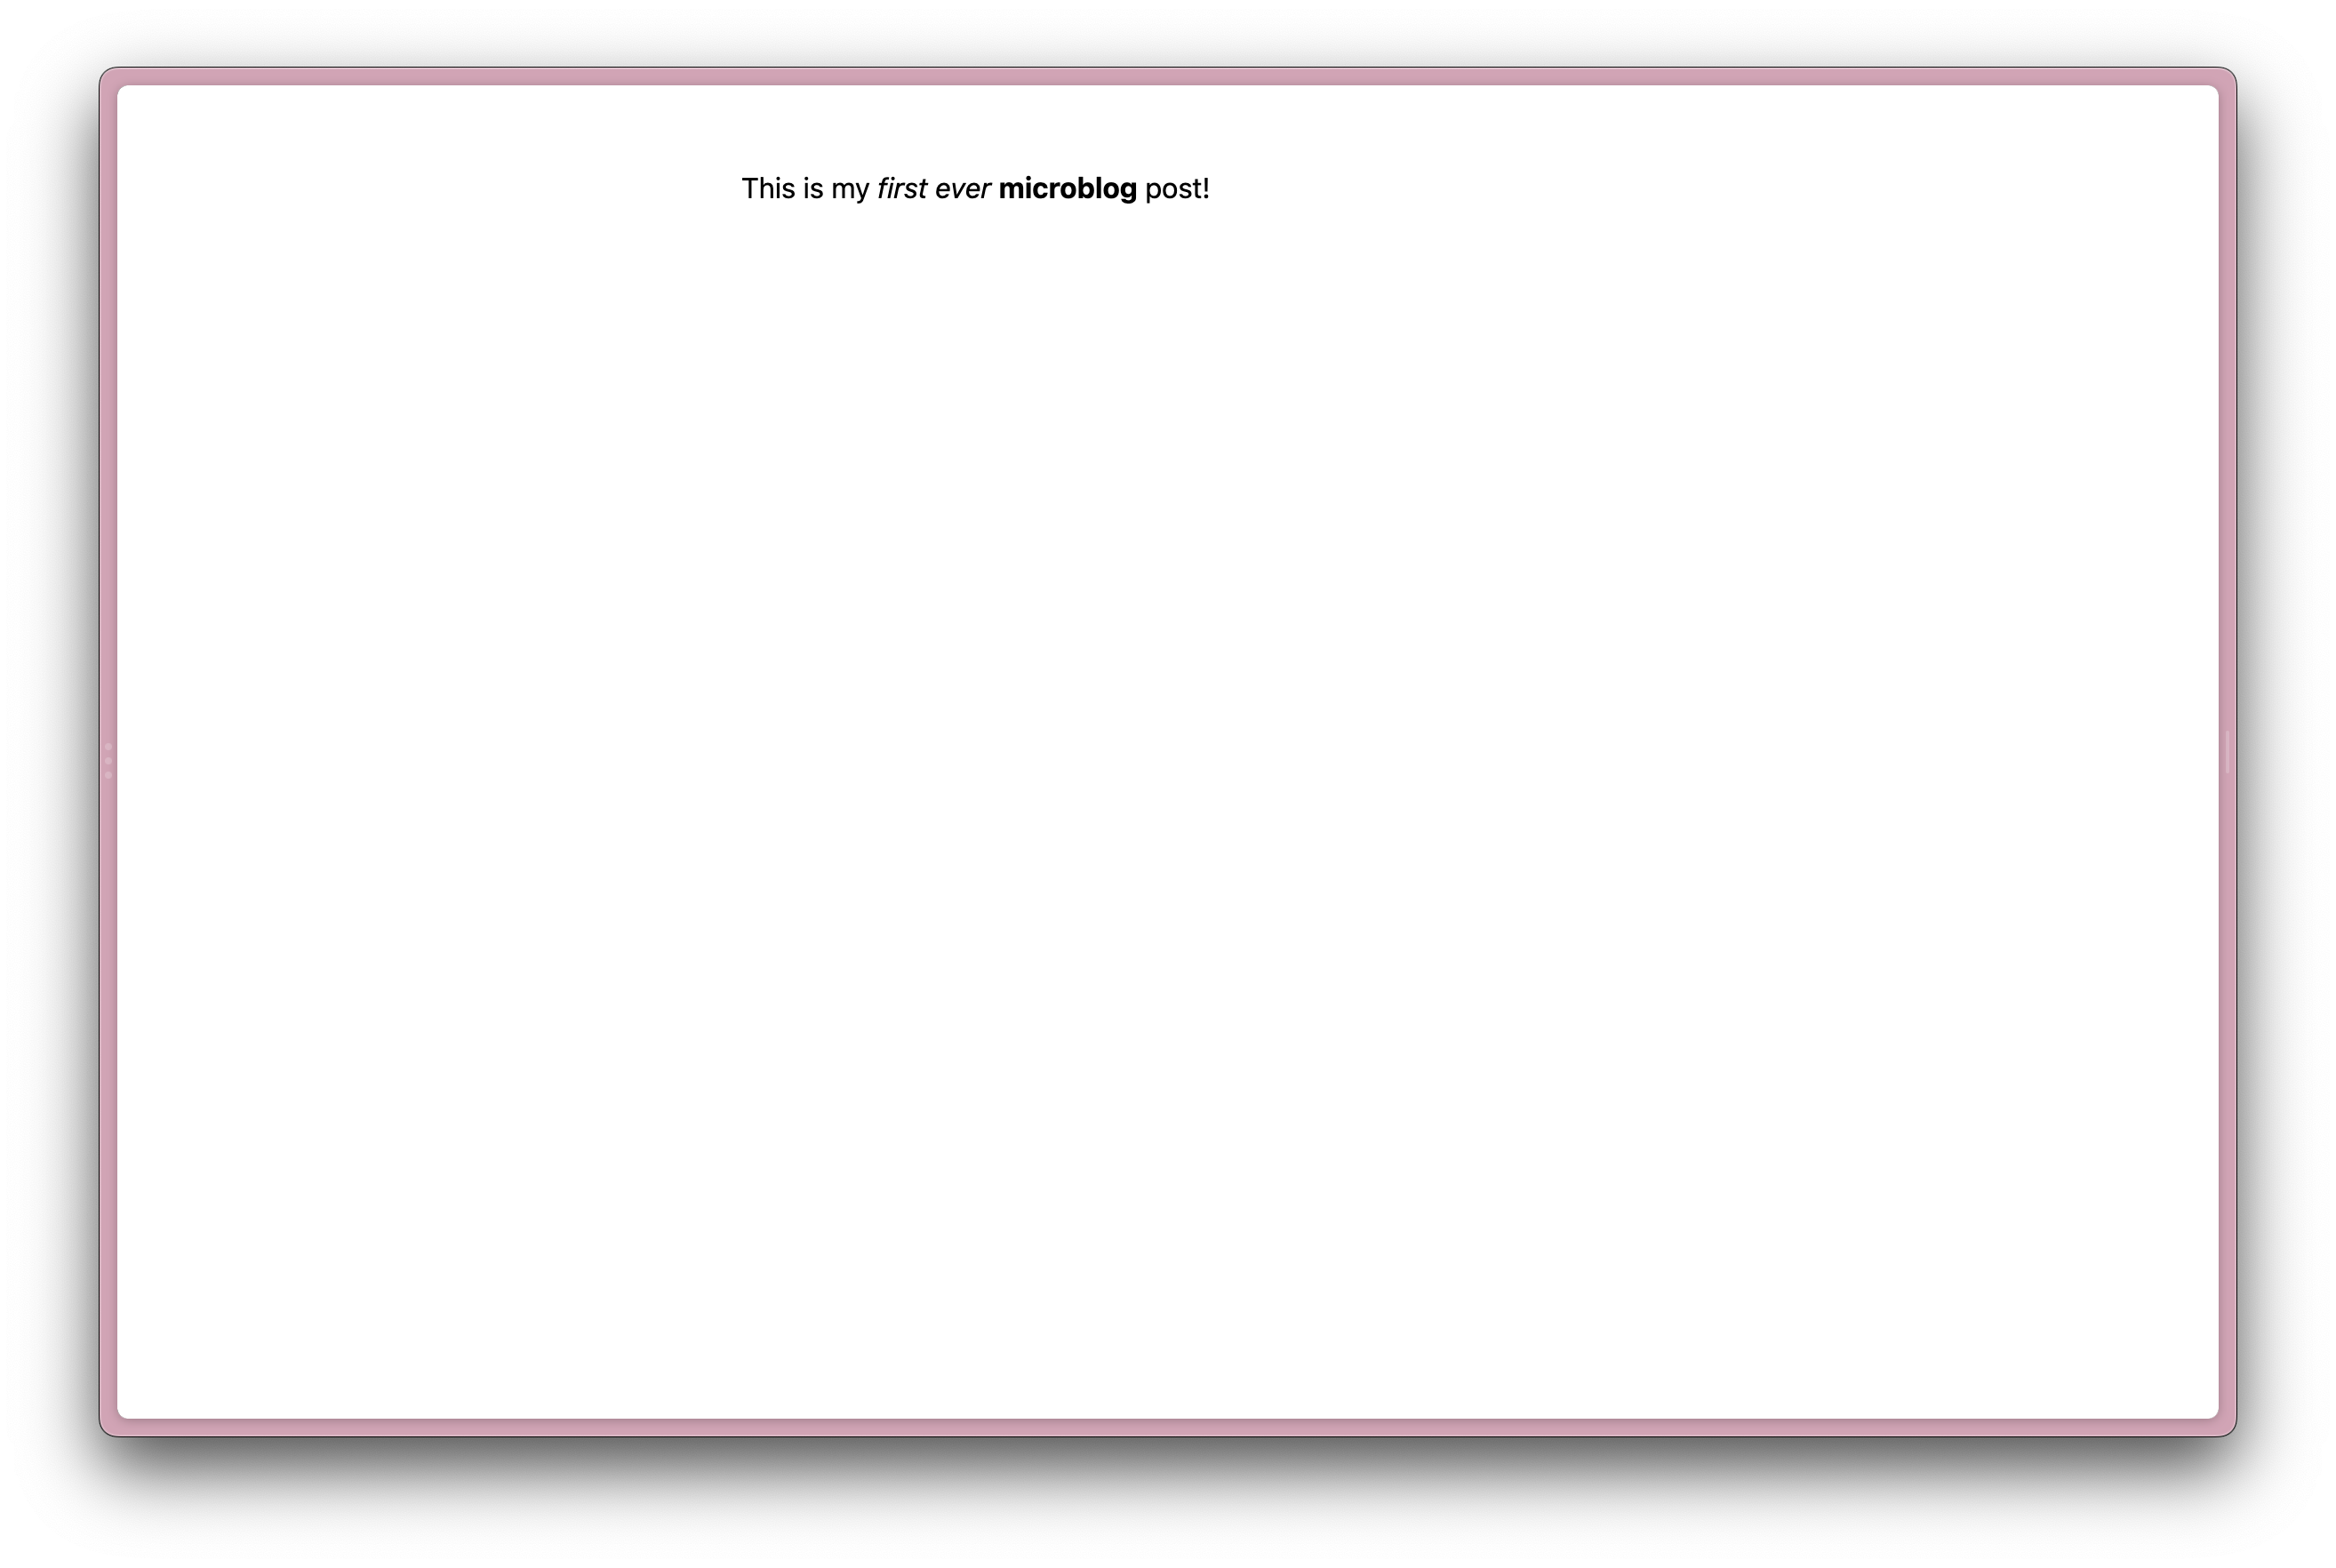
Check if it works
Open Prisma Studio again, decorate one of your posts with some markdown (or add a new one full of lovely markdown), hit ‘Save’, and refresh your /posts page…
Tada! Gorgeous. You can now format your posts in markdown, add links, images, quotes, and everything else that markdown offers.
Where’s your bold button ey Elon? Ye fuckin scruffy prick.
Stage 5: Individual Post pages
So, we have a nice dynamic list of posts. That might be all you want/need, but let’s look at how we might implement single post pages. This means each post can have its own URL – great if you want to implement webmentions.
Adding a slug field
First off, let’s add a slug field to our Posts model which we can use later do identify it via a URL. Open up your prisma.schema file, and change your Posts model to this:
model Post {
  id              Int       @default(autoincrement()) @id
  text            String    @db.VarChar(10000)
  slug            String    @unique() @db.VarChar(600)
  createdAt       DateTime  @default(now())
}
Let’s push this new schema to PlanetScale:
npx prisma db pushYou’ll see the following warning:
⚠️ We found changes that cannot be executed:

  • Added the required column `slug` to the `Post` table without a default value. There are 2 rows in this table, it is not possible to execute this step.


? To apply this change we need to reset the database, do you want to continue? All data will be lost. › (y/N)
Hit y and pour one out for your beautiful test data.
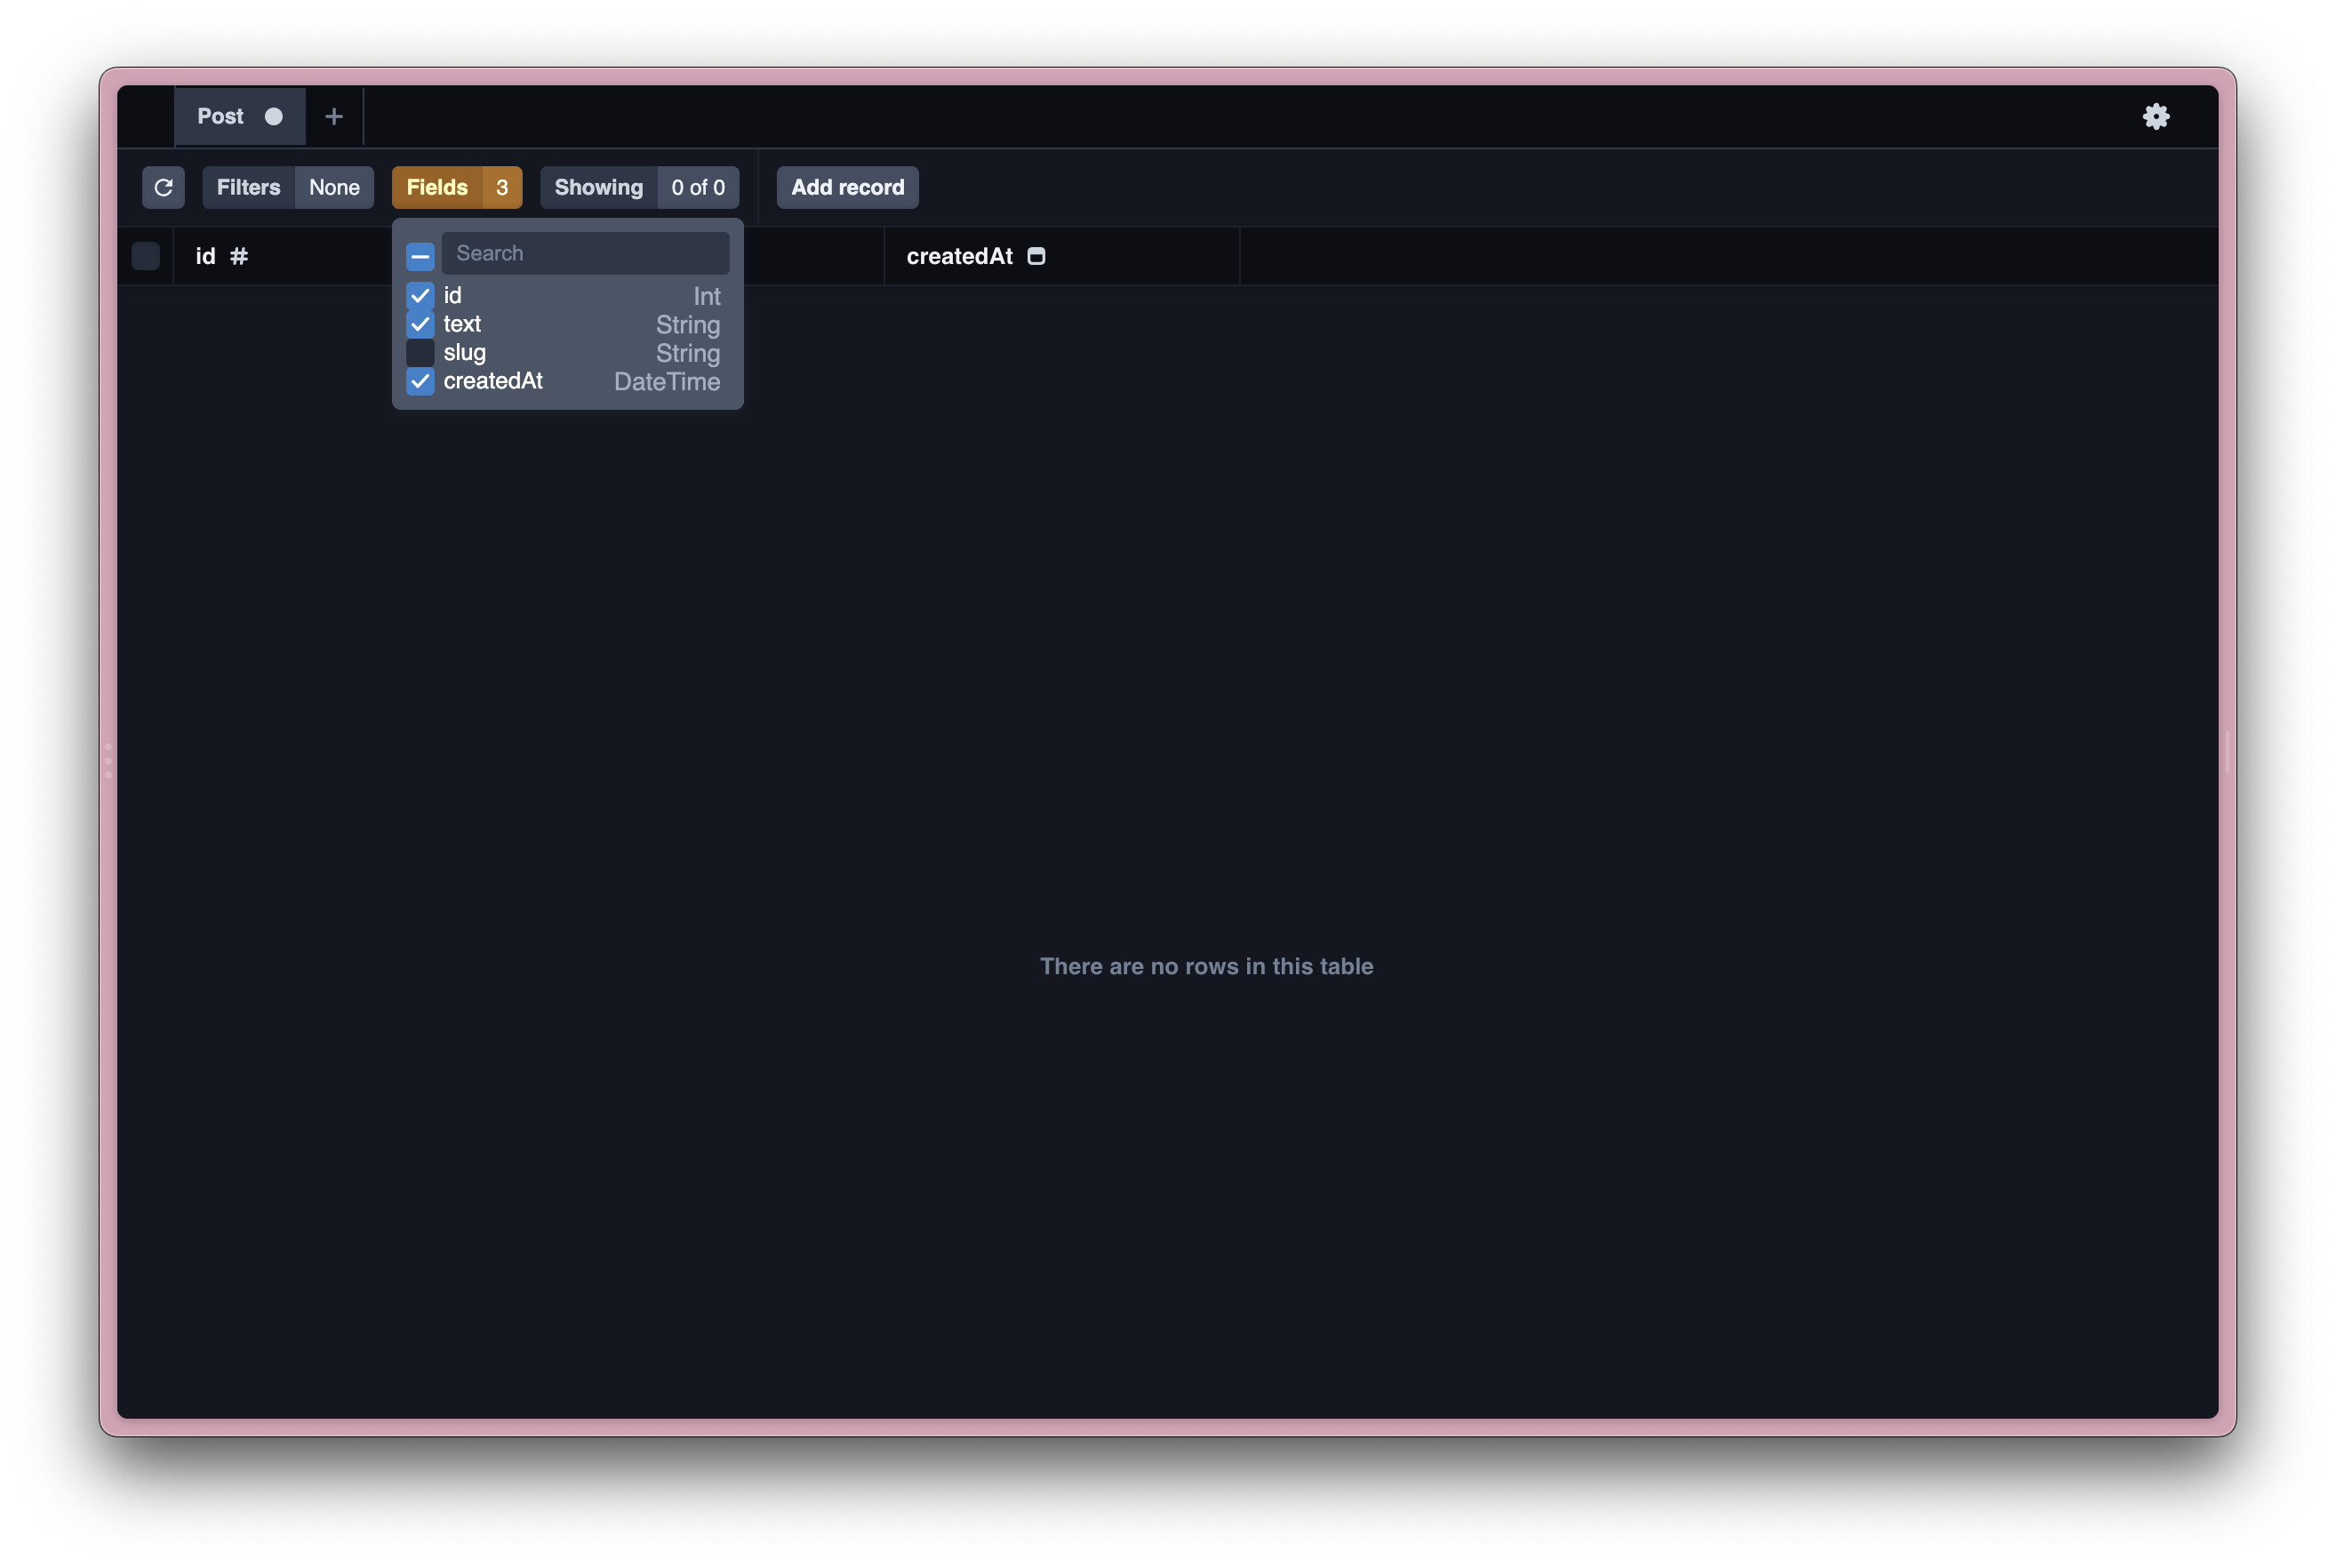
Restart Prisma Studio (Ctrl + C to stop the server, then re-run npx prisma studio) and you should be able to see the slug field when accessing your Posts model.
If you can’t see this field, make sure it’s selected in the ”Fields” button in the Prisma Studio filter bar.
Add some fresh data
If you had to reset your data when updating the schema, then you’ll want to go add some new posts – making sure you add a slug for each one.
Setting up a dynamic route in Svelte
In your src/routes/posts/ folder, create a folder called [slug]. Using square brackets lets SvelteKit know that this is a dynamic route.
Inside this folder, create a +page.svelte file, and add the following:
<script>
  export let data
</script>

<article>
  {data.text}
</article>

<style>
  /* Remember that using :global like this is not advised */
  :global(body) {
    margin: 0;
    padding: 0;
    font-family: -apple-system, BlinkMacSystemFont, 'Segoe UI', Roboto, Oxygen, Ubuntu, Cantarell, 'Open Sans', 'Helvetica Neue', sans-serif;
  }
  article {
    max-width: 480px;
    margin: auto;
    margin-top: 3rem;
  }
</style>
There’s that export let data pattern again – so can you guess what we’re going to do next? That’s right, we’re going to make a cup of tea and ahve a little cry.
After that, we’re going to create a +page.server.js file in the same folder. Add the following:
export async function load({ params }){
  const  text = "Wow look at me, I’m shitposting on my own server…"
  return {
    text
  }
}
Remember that any time we have a +page.js or a +page.server.js file that exports a load() function, the return value of this function will be available in the sibling +page.svelte file as a data prop. This means we can pass a (currently hard-coded) object that describes our post from the +page.server.js file into our Svelte component.
If you head to /posts/some-random-slug/ in your browser now, you should see the ‘Wow look at me…’ content being rendered.
Pulling our post data in
So we’ve got our boilerplate sorted, and we’re able to access a dynamic [slug] route and render content from a load() function. Let’s make sure our server code is pulling the right content in.
In src/routes/posts/[slug]/+page.server.js, we’re going to do something super similar to what we did for our posts index. Add the following at the top of your file:
import { PrismaClient } from '@prisma/client'
const prisma = new PrismaClient()
And, change your load() function to this:
export async function load({ params }){
  const post = await prisma.post.findFirst({
    where: {
      slug: params.slug
    }
  })
  return post
}
The whole file:
import { PrismaClient } from '@prisma/client'
const prisma = new PrismaClient()

export async function load({ params }){
  const post = await prisma.post.findFirst({
    where: {
      slug: params.slug
    }
  })
  return post
}
Now if you access /posts/{a-real-slug} (where {a-real-slug} is a slug you’ve set against a post in your database) in your browser, you should see the text of your post showing up. Et voila!
Yeah but it looks like shit…
If you’ve used markdown in your post, it might indeed look shit. Change your /posts/[slug]/+page.svelte file to this:
<script>
  import snarkdown from 'snarkdown'
  export let data
</script>

<article>
  {@html
    data.text
    .split(/(?:\r?\n){2,}/)
      .map((l) =>
        [" ", "\t", "#", "-", "*", ">"].some((char) => l.startsWith(char))
          ? snarkdown(l)
          : `<p>${snarkdown(l)}</p>`
      )
      .join("\n")
  }
</article>
Or, if you don’t care about paragraphs:
<script>
  import snarkdown from 'snarkdown'
  export let data
</script>

<article>
  {@html snarkdown(data.text)}
</article>
And you should be rendering a pretty nice, markdown-powered chunk of content. Nice job!
Now’s the time to polish – try jumping in and adding your own touch to things with some CSS, or go all-in and create a +layout.svelte file in src/ and add a global header and footer, then build out a whole fucking site in Svelte. It’s fun, I promise!
So what’s next…
Over to you! This is a barebones example with some clear potential for improvement. Here’s a few suggestions:
- Deploy your fabulous work to wherever you fancy. Mine’s up on Vercel, but you do you. Remember to set the
DATABASE_URLenvironment variable on any of your production/staging deploy environments. - Write a lightweight ‘posting’ app that pushes content to your database, so you’re not relying on Prisma Studio or manual SQL queries (it gets old fast, trust me.)
- Implement webmentions so you can collate replies and mentions from around the web
- Port the
+page.server.jscode to be a lightweight API endpoint, so you can access posts across your site or even from other services (hint: this is easier than you think, and can be as simple as creating a/src/routes/api/postsfolder with a+server.jsfile in it.) - Expand your ‘posting’ app to cross-post to Mastodon, Twitter, or any other shortform service.
Resources
- The SvelteKit docs
- A really nice Setting up PlanetScale and Prisma quickstart guide
- Micro.blog – a hosted solution and fantastic project, if you don‘t wanna build this kind of thing yourself


